Part 1:
Hello Students!
TODAY, we will be taking photos and uploading images onto our Weebly Blogs. If you don't have your new page on your blog yet, be sure to include that first!
Next, begin uploading photos onto your weebly blog. See how in the steps below:
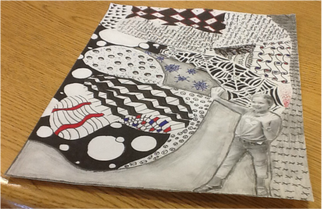
Things to think about when taking photos: Be sure you have good quality photos, they are completely strait (not at an angle), they are cropped with no extra space around the edges. (see good vs. bad quality photos below)
TODAY, we will be taking photos and uploading images onto our Weebly Blogs. If you don't have your new page on your blog yet, be sure to include that first!
Next, begin uploading photos onto your weebly blog. See how in the steps below:
Things to think about when taking photos: Be sure you have good quality photos, they are completely strait (not at an angle), they are cropped with no extra space around the edges. (see good vs. bad quality photos below)

|
|
- First take photos of all your artwork with your device. (see the list of what to take below.)
- Then transfer your photos using the cable for your device and save them to your OneDrive
- Then login to your weebly blog.
- Once you are in the weebly blog editor, click and drag the image icon to your page. You will then be able to upload an image from your computer. (from the OneDrive)
- Be sure to add a title for each image using the "Title" icon that you will also click and drag to your page.
- Exotic Environment (should be put in the Summative area)
- Value Marshmallow drawings (black AND white in summative area)
-
- Any COMPLETED altered book pages (should be put together in the Altered book section)
- Sketchbook covers; front AND back (these should be put on the Sketchbook section of your blog)
- Photograph all of your sketchbook assignments thus far and put them on the Sketchbook section
- Any other artwork that you have done outside of class, for art contests, or in previous art classes can be added to another page that you can label "More/Other Art" page.
How to upload photos to the blog AND blog edits video Fall 2021:
| making_a_weebly_website_spring_2022.docx |
Below, you can see a video demo of how to add images to your weebly blog. For a full-screen version, click on this link!!
How to upload images from your device using a cord:
1. click on the search bar at the bottom left of your screen.
2. Type in "This PC"
3. The finder window will come up and you can look under devices and drives.
4. Find your device and click on it. (if you have an apple iPhone, you will have to click "allow" on your device.
5. Search for your images.
6. Click and drag your images to your student ID number on the left side of the window.
 RSS Feed
